Comprehensive CRM Guide [Beta]
Looking for a shorter overview of Roundtable's CRM? 🤔 Check out our FAQ or Quickstart Guide!
Quick Navigation
- Setting up your CRM
- Connecting your Spaces
- Adding Records to your CRM
- Managing CRM Records
- Organizing your data
- Analyzing your data
- Sending Emails
- Creating Emails
Roundtable CRM Overview
The Roundtable CRM is your centralized place to manage contacts, track engagement, and coordinate outreach — all directly connected to the spaces and work you’re doing in Civic Roundtable.
Whether you're running a working group, launching a campaign, or coordinating technical assistance, the CRM keeps everything aligned in one place.
Setting Up Your CRM
🔍 Navigating to the CRM
When logged into Roundtable, you can access your CRM from the left sidebar under the Admin section

🖌️ Customizing Your CRM
Make your CRM uniquely yours by configuring the following:
- CRM name and URL: Choose a name and custom URL.
- Logo: Upload your organization’s logo.

💼 Managing Users and Permissions
Before adding Members and Admins to your CRM, you must first share a Roundtable Space with them. This ensures users already have access to the Roundtable ecosystem before joining your CRM.
You can manage these permissions by going to “Settings” and selecting “Users”.
Once shared, you can assign one of two roles:
| Member Permissions 👤 | Admin Persmissions 💼 |
|
|
🔒 CRM Privacy
All CRM data remains completely private and internal to your CRM teammates.
Members in Spaces cannot see any information entered in the CRM system, including member profiles, notes, or tags. Members will only see the content intended for them within their Spaces.
Connecting Your Spaces
🔗 How Connected Spaces Work
Connected Spaces are existing Roundtable Spaces that you link to your CRM. This integration:
- Automatically syncs space members and organizations.
- Keeps profile data consistent across products.
✏️ How to Connect a Space
- Go to Settings → Connected spaces.
- Click Add connection.
- Select the space(s) you want to connect.
✨ RT Tip: You must be a Space Manager to connect a space. ✨
🔀 Profile Syncing
Record Creation
All space members and their associated organizations are automatically added to your CRM when a space is connected.
Synced Profiles
People records linked to a connected space will have their CRM record automatically synced with their Roundtable profile. Updates to email, location, or other profile fields made by the member will automatically reflect in your CRM.
✨ RT Tip: Synced person data cannot be manually edited in the CRM. To add additional information, use tags or custom fields instead. ✨
Automatic Updates
If you manually add a person to your CRM and later connect a space where a member exists with a matching email address, the manual profile will be automatically updated to a synced profile.
↩️ Disconnecting Spaces
To disconnect a space:
- Go to Settings → Connected spaces.
- Click the More options (⋯) menu.
- Select Disconnect.
✨ RT Tip: Disconnecting a space will not remove members or organizations from your CRM. Person records will stop syncing automatically, allowing manual edits if needed. ✨
➕ Adding Multiple Spaces
When connecting additional spaces:
- Existing CRM records will not be duplicated.
- New spaces will appear in each person’s side panel.
- Member profiles remain unchanged across spaces.
- Each connected space appears as a link in the left sidebar for easy filtering.
Adding Records to Your CRM
You can add People and Organizations to your CRM in three ways:
🖇️ Connected Spaces
Automatically imports all members and their associated organizations when you connect a Roundtable Space.
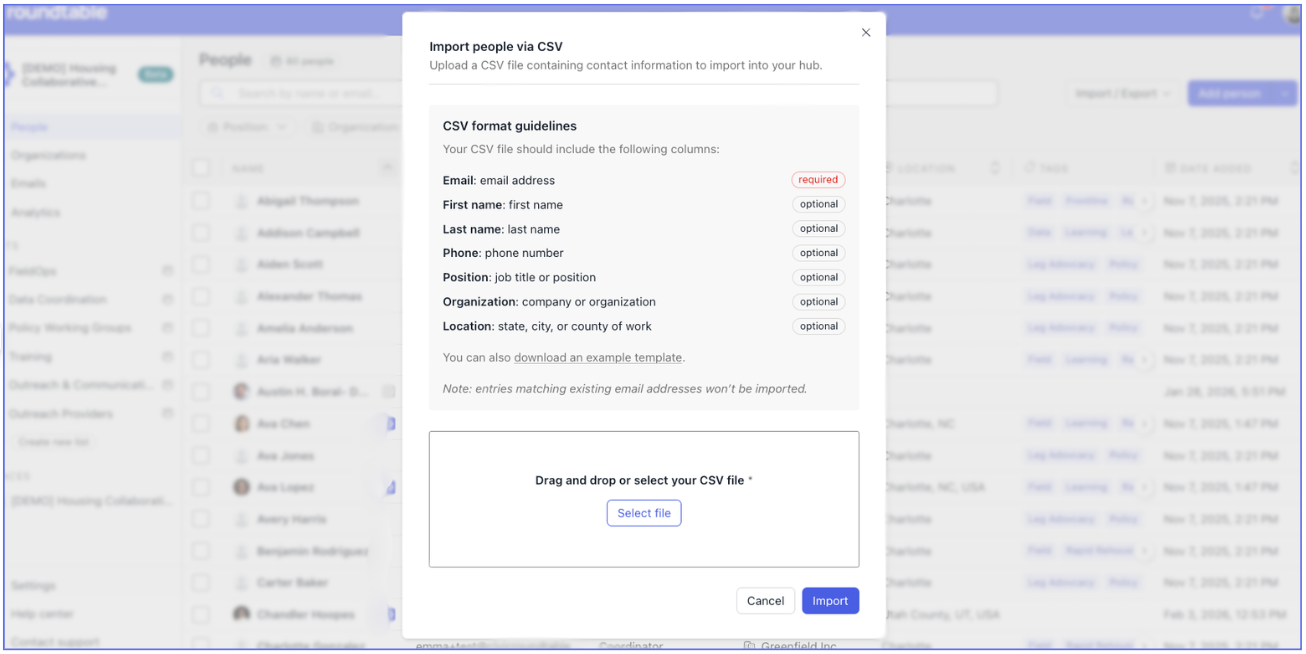
📁 CSV Import
- Go to the People or Organizations tab.
- Click Import / Export → Import CSV.
- Upload a CSV file with the required fields.
Duplicates will not be created when uploading:
- People with email addresses that already exist in a person record in the CRM.
-
Organizations with names that match the name of an existing Organization record in the CRM.

✍️ Manual Creation
- Go to the People or Organizations tab.
- Click Add person or Add organization.
- Fill in the required fields.

🤳 Scan Business Cards
- Click the down arrow next to “Add Person”
- Select “Scan Business Card”
- Upload a picture of the business card you’d like to upload
- Verify scanned information and finalize upload!

Managing Records
👀 Viewing and Managing Records
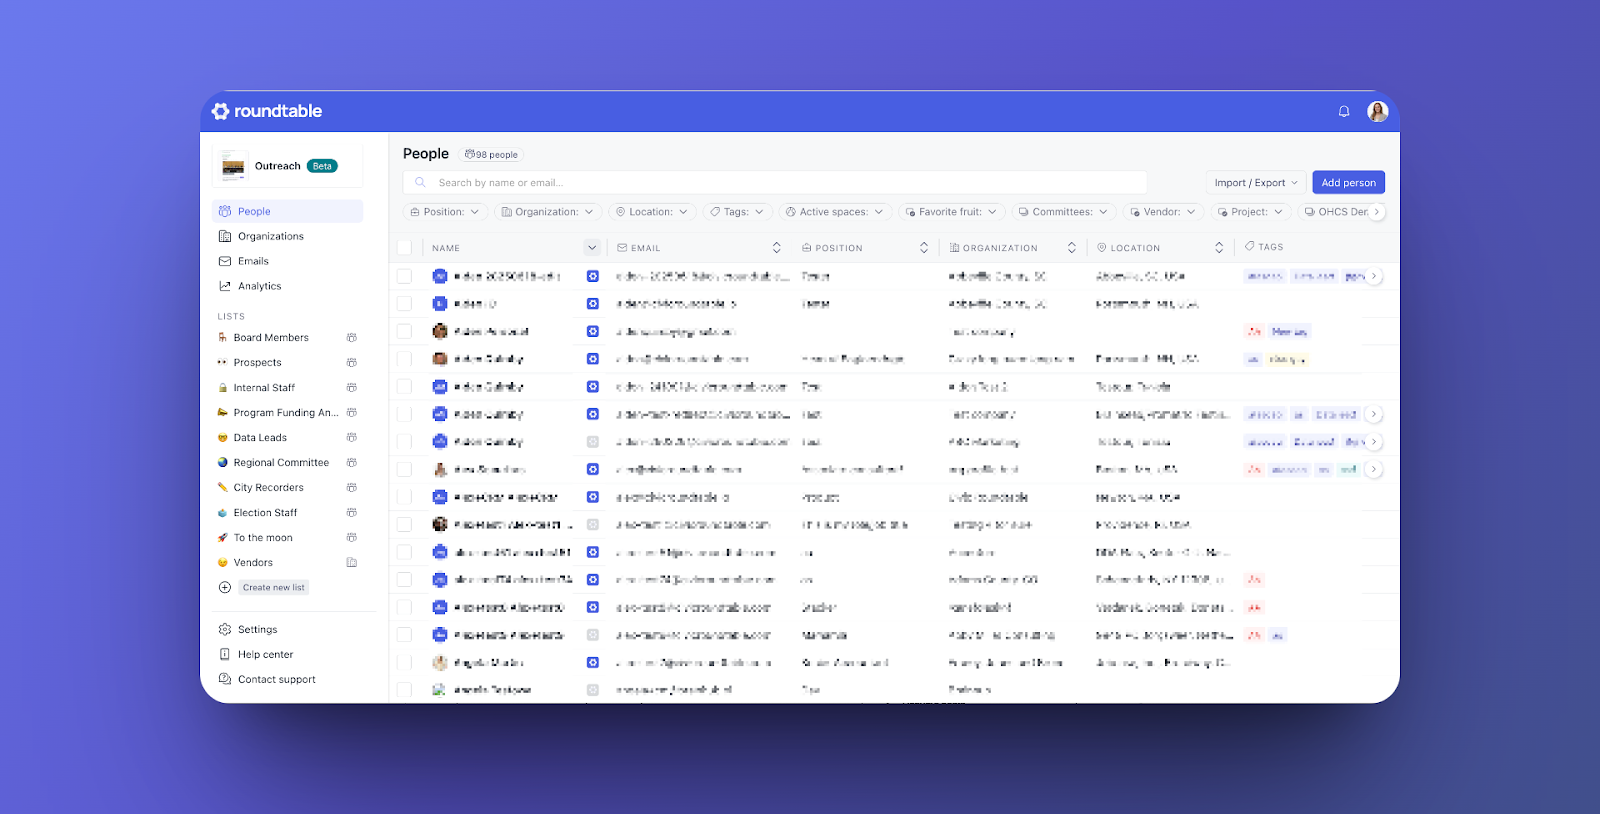
People / Organizations Table
Access all records in a searchable, filterable table. Export records to CSV for external use or analysis.
Record Side Panel
Click any record to open a detailed profile, including:
- Complete contact information
- Applied tags and list memberships
- Custom fields
- Notes
- People only: Connected spaces and membership status

🗒️ Notes
Collaborate with your team using notes to capture ideas, track interactions, and share insights. Notes on person records support threaded conversations and resolution.

| Notes Feature | How to |
| 📝 Creating a Note |
|
| 💬 Replying to a Note |
✨ RT Tip: Replies are limited to one level deep to keep conversations readable.✨ |
| ✅ Resolving a thread |
✨ RT Tip: The conversation will collapse but can be expanded later✨ |
| 🔒 Notes Privacy |
|
✅ Other Record Actions
For each record, you can:
- Edit profile: Modify contact information (unless synced).
- Copy link: Share direct links with teammates.
- Delete record: Permanently remove the record (cannot be undone).
- Add to lists: Group records for outreach or campaigns.
- Apply tags: Categorize records for filtering and search.
Organizing Your Data
🖊️ Custom Fields
Custom fields capture structured information specific to your team, such as:
- Department, Lead source, Priority level, Committee membership, Event attendance, Working group participation

| ➕ Adding Custom Fields |
|
| 🤔 How Custom Fields Work |
|
🏷️ Tags
Tags provide flexible, lightweight organization.
Creating Tags
- Go to Settings → Tags.
- Click Add tag.
- Choose a name, color, and optional description.
Adding Tags to Records
- From the record side panel.
- Via bulk selection in the table.

📝 Lists
Lists are named groups of records used for outreach, campaigns, and bulk actions.
Creating Lists
- Click Create new list in the sidebar, or
- Create one on the fly while adding records.

Adding Records to Lists
There are multiple methods for adding records to lists.
- From list view using Add to list.
- From a record’s side panel.
- Via bulk selection in the table “People” tab
- From a CSV import.
- You can upload the same contact to multiple CRM lists, and they’ll appear in each appropriate list without creating duplicate profiles.
Exporting Lists
Export any list to CSV for external use or analysis.

🤔 When to Use Custom Fields vs. Tags vs. Lists
| Feature | Purpose | Best for | Examples |
| Custom Fields | Structured, consistent data | Data needed across all records | Department, Lead Source |
| Tags | Flexible metadata | Quick filtering and segmentation | VIP, Needs follow-up |
| Lists | Actionable groups | Campaigns and outreach | Newsletter recipients |
Analyzing Your Data
📊 CRM Analytics
Gain insight into how your team is using the CRM by visiting the Analytics tab in the left sidebar.

Sending Emails
Roundtable’s email functionality allows you to send professional communications directly from your CRM to people, lists, and spaces.
✨ RT Tip: Only custom domains allow custom senders / reply-to✨
📤 Verifying Your Domain
To send emails using your organization’s domain, you must verify domain ownership by adding DNS records. For example, if you work at Civic Roundtable and your email is Emma@civicroundtable.com then your domain is civicroundtable.com.
Why Verify Your Domain?
- Improved deliverability
- Recognizable sender address
- Protection against spoofing
- Domain reputation protection
|
Step 1: Access Email Domain Settings
|
Step 2: Retrieve DNS Records
|
Step 3: Add Records
|
Step 4: Verify your domain
|
🆘 Troubleshooting: If verification fails, allow up to 24 hours and confirm records were added. For help, contact support@civicroundtable.com. 🆘

⚙️ Using Roundtable's Domain
You can also send emails via the Roundtable CRM without verifying your domain by using the default crm.civicroundtable.com domain. This allows you to start sending emails as soon as you configure your CRM!

Senders will see your email attached to @crm.civicroundtable.com. Your Reply-to address isn't fully open-ended — it must match an email address that already exists as a verified sender or a CRM user. This restriction protects your organization: it prevents replies from being accidentally (or maliciously) routed to an inbox outside your org.
For example, a user could select an existing CRM user's email, like info@civicroundtable.com, as the Reply-to when sending from Emma's CRM account. Recipients would see the email as coming from Emma Rage at emma@civicroundtable.com, but replies would route to info@civicroundtable.com.
If the address you want to use as a Reply-to isn't yet a verified sender or CRM user, add it as a CRM user first (see Adding Records to your CRM) — then it becomes available to select as a Reply-to.
Note: Verifying a subdomain (e.g. messages.yourorg.org) does not automatically verify the root domain (yourorg.org) for Reply-to purposes. If your Reply-to needs to live on the root domain and that domain can't be verified, add that address as a CRM user as a workaround.
Senders will see your email attached to @crm.civicroundtable.com. You can configure your 'Reply-to' to whatever inbox you choose!

More domain questions? Check out our DNS & Custom Domains article.
Creating Emails
📨 Creating an Email
You can create emails from
- The Emails tab
- Bulk actions on the People tab
- Any People list
🖊️ Composing Your Email
Sender Information
The From field uses your profile name and your organization’s verified email address.
Recipients
Choose from:
- People lists
- Spaces
- Individual people
✨ RT Tip: Recipients must already exist as CRM records. ✨
🖥️ Email Content
- Subject line: Clear and descriptive.
- Body: Rich text editor supports formatting, links, emojis, and attachments (up to 10 MB combined).

📪 Email Delivery Details
- The system automatically removes duplicates when sending – if someone appears in multiple selected lists, they'll only receive one email
- Each email is sent individually to recipients – recipients cannot see other email addresses or reply to the group
- An unsubscribe link is automatically added to every email
👥 Drafts and Collaboration
All CRM users can view, edit, and send emails created by teammates.
Draft Emails
- Editable and sendable by any CRM user.
Sent Emails
- Viewable history.
- Cannot be edited after sending.

📈 Tracking Email Performance
Track engagement metrics including:
- Delivered
- Bounced
- Spam
- Opened
- Clicked
- Unsubscribed
To learn more about these analytics, read the article on understanding your CRM email open and click rates.
Recipient Reports:
Click View recipient details to see engagement per recipient.

✨ RT Tip: There are different reasons why you may see "bounced" in recipient reports.✨
Common reasons for Bounced Status includes:
- Hard Bounce: The email address no longer exists.
- Soft Bounce: The mailbox is full and not accepting emails.
- Autoresponder: Automatic email responder including nondescript NDRs and some out of office replies.
- Transient/Undeliverable, Message Delayed, DNS Error: There were problems connecting to the person’s mail server.
- Challenge Verification: A message was returned asking for approval.
- Unsubscribe, Address Change: A change of address or unsubscribe was requested.
👤 Emails in Person & Organization Profiles
Emails sent via the CRM appear in each person or organizations Emails tab.
This provides:
- Visibility before follow-ups
- Personalization through conversation history
- Coordination to avoid duplicate outreach

